What Is DTF Printing? The Operator Guide to Direct to Film Transfer
- Share
- publisher
- FCOLOR Editorial
- Issue Time
- Aug 5,2026
Summary
A production-floor guide to DTF printing: the four-stage direct-to-film workflow, how to choose DTF ink film and powder, the seven problems that cause most failed transfers, and how to decide if DTF printing fits your shop. From FCOLOR, a DTF printer manufacturer in Dongguan.
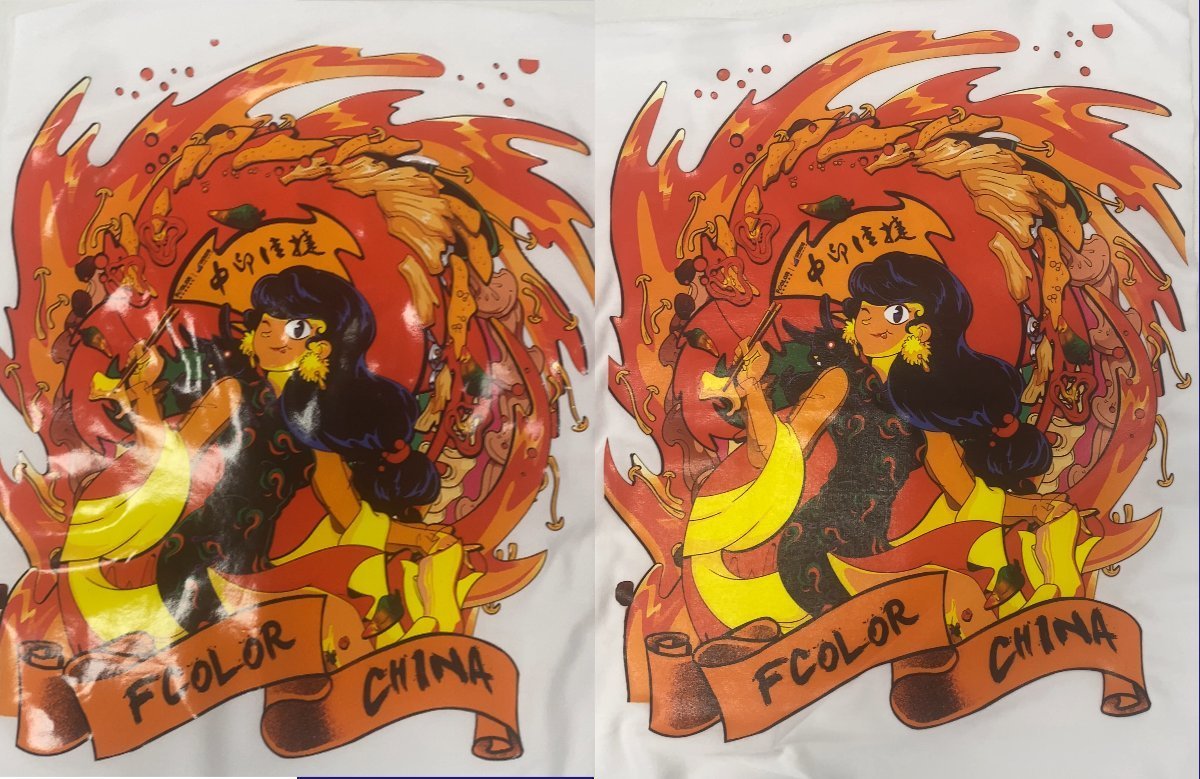
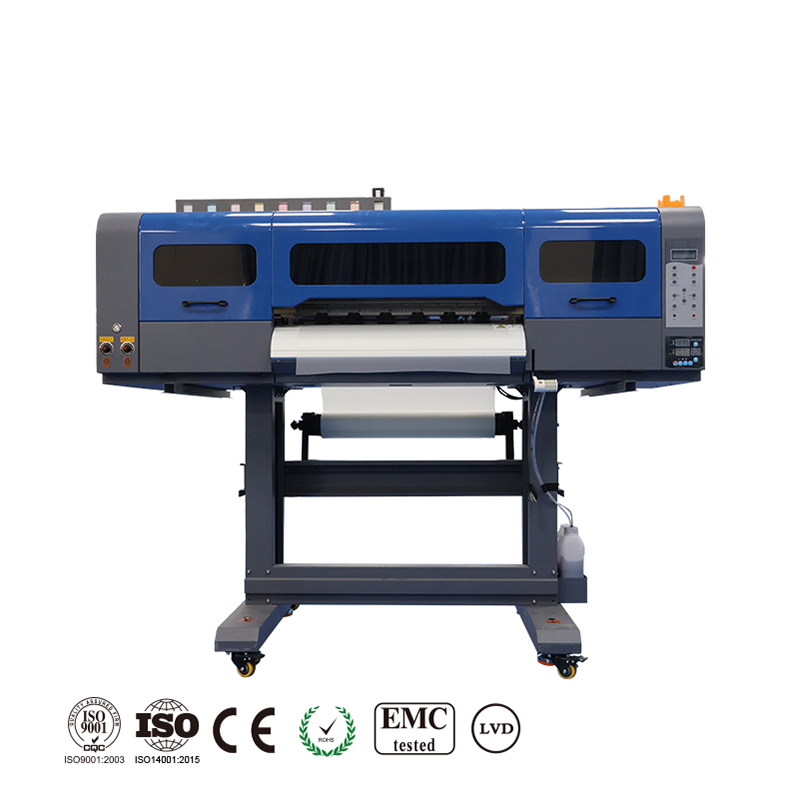
Direct answer: DTF (Direct to Film) printing is a four-stage digital transfer method that lays down CMYK ink and a white base layer onto PET film, coats the wet ink with hot-melt adhesive powder, cures the powder into a smooth adhesive film, and heat-presses the cured film onto the garment before cold-peeling the carrier. The method handles cotton, polyester, denim, canvas and blended fabrics in a single workflow without pretreatment, which is why DTF printing has moved from a niche technique to mainstream garment decoration in less than five years.
This guide explains the DTF printing process the way a production-floor operator would walk you through it: each stage in detail, the consumables that determine the final result, the seven problems that account for most failed transfers, and how to decide whether DTF printing fits the order mix your shop actually runs.
What Is DTF Printing and How Does DTF Printing Work?
DTF stands for Direct to Film, and unlike methods that use the name as marketing shorthand, the DTF printing name is literal. A DTF printer lays your design onto a sheet of PET transfer film rather than directly onto the fabric. That film is then coated with hot-melt powder, cured, and heat-pressed onto the garment. After pressing, you peel the carrier film off cold and the design stays on the shirt.
The reason DTF printing has gone from "that new thing people are trying" to sitting next to the heat press in mainstream garment shops is the same reason it frustrates operators who learn the wrong way: the method looks simpler than it is. Print, powder, cure, press — how hard can it be? The honest answer is that each of those four stages has a narrow parameter window, and missing any one of them turns a perfect print into a return.
Four Stages of DTF Printing in Order
- Print. A DTF printer deposits a CMYK color layer and a white base layer onto PET transfer film. The white layer is laid down last, on top of the color — the reverse of how DTG works. On the film you see the color side; the white side faces the garment when pressed.
- Powder. While the ink is still wet, hot-melt powder is shaken onto the printed film. The powder only sticks to the wet ink, and excess powder shakes cleanly off the non-printed areas.
- Cure. The powdered film enters a curing oven (or curing station) where heat melts the powder into a smooth, even adhesive layer fused to the ink. This stage decides whether your transfer peels clean or leaves half the design on the film.
- Press. The cured film is placed onto the garment, white-side down, and run through a heat press at the correct temperature and time for the film grade. After the garment has cooled to room temperature, the carrier is peeled away cold, leaving the design embedded in the fabric.
Most operators who struggle with DTF printing treat one of these four stages as a black box. They buy a printer and worry only about print resolution, then blame the printer when the transfer cracks at ten washes because they applied too much powder in stage two. The cure stage controls wash durability more than the printhead does. If you take one thing from this guide on DTF printing, take this: the quality of the final garment is set by the weakest of the four stages, not the strongest.

The DTF Printing Workflow: Each Stage in Production Detail
Problems in DTF printing almost always trace back to one of the four stages. The way to run a clean DTF printing shop is to understand exactly what happens inside each stage and where the parameter window is narrowest. Below is the production-floor walkthrough of what actually occurs at each step.
Stage 1 — Printing onto PET Film in DTF Printing
The printer deposits the CMYK ink onto the PET film first, then lays down a white ink layer on top. This reverse print order is critical — if the white layer were printed first, the CMYK color would sit under the opaque white and never be seen. The reverse stacking is what makes DTF printing work on dark garments without a separate white-over-color pass.
The film itself matters more than most DTF printing guides admit. A production-grade DTF PET film has three properties that decide whether the workflow runs cleanly or generates constant waste:
- Anti-static coating. Film without anti-static treatment attracts lint and dust from the air like a magnet. The debris embeds into the wet ink and shows up as pinholes in the final print. Cheap film is one of the single biggest sources of pinholes in DTF printing.
- Ink receptivity. The coated side of the film needs to hold ink without letting it bead up or spread. Too much spread and fine text fills in. Too little and the ink does not bond well enough to hold powder in stage two.
- Heat stability. During cure, the film has to stay flat. Cheap film curls at the edges or shrinks, which jams the curing belt and ruins the transfer. In a continuous DTF printing line this is a daily problem if you skimp on film.
Production tip: Store your DTF printing film in its original packaging, lying flat, away from humidity. Film that absorbs moisture from the air prints differently than film stored in a dry cabinet. If you operate in a humid climate — Southeast Asia, coastal regions, anywhere summer means 80 percent humidity — invest in a dehumidifier for the film storage area. The cost of the dehumidifier is less than the cost of one ruined print run.
Stage 2 — Applying Hot-Melt Powder in DTF Printing
Once the ink is on the film, hot-melt powder is shaken over the wet print surface. The powder sticks only to wet ink; dry, non-printed areas release the powder when the excess is shaken off. This is the one stage in DTF printing where operator feel matters more than machine settings.
Powder selection is not a one-size-fits-all decision. The three variables that change the final result are:
- Particle size. Fine powder (80-120 microns) gives a smoother finish and better detail on small text, but it melts faster and is less forgiving if your cure temperature drifts. Coarse powder (120-200 microns) builds a thicker adhesive layer that holds better on heavy fabrics like denim and canvas, but feels rougher on lightweight cotton.
- Melt point. Most hot-melt powders used in DTF printing melt between 110 °C and 130 °C. Melt point drives both the cure oven temperature and the press temperature, so if your powder melt point and your film heat tolerance do not match, you end up with either incomplete melting or film warping.
- Wash fastness. This is what separates factory-grade powder from generic powder in DTF printing. Good powder bonds to both the ink and the fabric fibers at a chemical level; that is why a properly cured DTF printing transfer survives 50-plus washes without peeling. Cheap powder sits on the surface and fails after 10-15 washes — exactly when the customer is washing the shirt they just bought.
The mistake almost every new DTF printing operator makes is applying too much powder. More powder does not equal better adhesion in DTF printing. It produces a thicker, stiffer transfer that cracks sooner because the adhesive layer is too thick to flex with the fabric. The target is even coverage in a single thin layer; if you can still see white powder grains after shaking off, you have applied about the right amount.

Stage 3 — Curing in DTF Printing
Curing is where most DTF printing production problems live. The powder on the film needs to melt into a continuous, semi-gloss film layer — not too shiny, not too matte, with no bubbles and no scorch marks. The cure window is narrow: typically 120-140 °C for two to four minutes, depending on the powder grade and oven type.
Cure too low and the powder melts unevenly. You will see a grainy texture under the gloss, which means the adhesive did not fully flow. Press that transfer and the design will peel off in patches after the first wash — the single most common DTF printing complaint from end customers. Cure too high and the film warps, the powder scorches, and a yellow tint appears on white areas that ruins color accuracy in the final print.
If you run DTF printing on a tunnel curing oven (the type built into most integrated DTF printing systems), belt speed and temperature need to be dialed in together. A standard calibration approach is to run a test strip with a known design that includes fine text, a solid fill area, and thin lines, and adjust the belt speed until the powder melts evenly across all three. Solid fills retain more heat and melt faster than fine lines, so the sweet spot is the belt speed where fine lines just barely melt fully while solids do not scorch.
If you are running DTF printing with a standalone curing oven or a heat press for curing, the process is slower but gives you more control. You can visually inspect the melt before moving the film to the press, which saves you from pressing a bad transfer onto a good shirt.
Stage 4 — Heat Press Transfer in DTF Printing
The cured film goes onto the garment with the white ink side facing down. Press parameters depend on your film and powder combination, but a typical starting point in DTF printing is 150-160 °C at medium pressure for 12-15 seconds.
Cold peel is mandatory in DTF printing. Do not peel the film while it is hot. The adhesive is still soft at pressing temperature, and pulling the film hot will stretch the design or lift it off the fabric. Let the garment and film cool to room temperature — usually 30-60 seconds — then peel in one smooth motion. If the film resists or the design lifts, either the garment has not cooled enough or your cure stage was incomplete. Both are common in DTF printing; both are fixable.
After peeling, a second short press of 5-8 seconds with a silicone sheet or Teflon cover helps set the adhesive deeper into the fabric fibers. This step is optional in DTF printing but noticeably improves wash durability on textured fabrics like canvas and denim.

DTF Printing Consumables: How to Choose Ink, Film, and Powder
DTF printing print quality depends as much on the consumables as on the printer. Putting a premium printhead behind cheap film and powder is the fastest way to be disappointed with DTF printing.
DTF Ink Selection
DTF printing ink is pigment-based and water-based, formulated specifically for film transfer. The three quality indicators that matter are:
- Color density. High-pigment-load inks produce vivid colors with less ink volume, which means faster drying on the film and less risk of ink bleed between the color and white layers in DTF printing.
- White ink opacity. White DTF ink must be dense enough to block the garment color behind it. Weak white ink requires multiple passes or higher ink volume, which slows production and raises cost per print.
- Printhead compatibility. Different printheads — Epson i3200, XP600, 4720, and others — have different ink viscosity requirements. Ink not formulated for the specific printhead in your DTF printing line clogs nozzles, causes banding, and shortens printhead life.
Production tip: Test any new DTF printing ink batch on a design that combines a large white area and fine black text on dark fabric before you commit to a bulk order. If the white looks gray after pressing, or the black text bleeds, the ink is not going to work for production — no matter what the spec sheet claims.
DTF PET Film Selection
DTF printing film quality shows up in three places during production: flatness after curing, powder adhesion, and cold peel release. Flatness matters because film that curls or warps through the heat cycle jams the cure belt. Powder adhesion matters because the coated side needs to hold powder evenly across the printed area without letting powder stick to non-printed zones — a hazy haze of stuck powder on the clear carrier is a tell-tale sign of a DTF printing film coating problem. Cold peel release matters because the film should peel cleanly after pressing and cooling, without leaving residue or taking ink with it.
The way to avoid film mismatches in DTF printing is to buy film and powder from the same supplier. Film and powder are designed as a system — the coating chemistry on the film is formulated to work with a specific powder melt profile. Mixing brands introduces variables that are hard to troubleshoot because neither supplier will take responsibility for the other supplier's product.
DTF Hot-Melt Powder Selection
DTF printing powder was discussed in the workflow section, but one extra point is worth making: buy powder from the same supplier as your film if at all possible. Film and powder are designed as a system; mixing brands works against the chemistry that makes DTF printing reliable. When you buy a matched system from one supplier, and a customer reports a DTF printing quality issue, the supplier can diagnose it without the finger-pointing that happens when film, ink, and powder come from three different factories.

Common DTF Printing Problems and Their Real Root Causes
Every DTF printing operator runs into these issues at some point. Knowing the actual root cause — not the symptom — saves hours of trial and error. The seven problems below account for the vast majority of complaints in DTF printing.
| Problem in DTF Printing | What It Looks Like | Most Likely Cause | Fix |
|---|---|---|---|
| Design peels after first wash | Transfer looks good after pressing but lifts after 1-2 washes | Incomplete cure — powder did not melt fully | Increase cure time or temperature; confirm powder melt point against oven calibration |
| Patchy or uneven white | White areas look thin or streaky after pressing | White ink not printing at full density, or powder coverage is uneven | Check white ink circulation and run a nozzle test; shake powder more thoroughly and confirm even coverage |
| Film curls during cure | Edges of the film lift and warp in the oven | Film grade cannot handle the cure temperature | Lower cure temperature by 5-10 °C and extend time; switch to a higher-temperature film grade |
| Powder sticks to non-printed areas | Excess powder does not shake off cleanly, leaving a haze on the transfer | DTF printing film coating problem or ink is too wet | Reduce ink volume; confirm film has not been exposed to humidity; try a different film batch |
| Color looks dull after pressing | CMYK colors look faded or washed out compared to the print on film | Insufficient white underbase opacity, or press temperature too high | Increase white ink density; reduce press temperature by 5 °C |
| Transfer feels stiff or rubbery | Print has a thick plastic-like hand feel | Too much powder applied | Reduce powder coverage; use finer-grain powder for lighter fabrics |
| Pinholes or small spots in the design | Tiny unprinted dots visible in solid areas | Dust or lint on the film before printing, or clogged nozzles | Clean the film feed path; run a nozzle check and head cleaning cycle |
The pattern across this DTF printing troubleshooting table is that the problems are almost never single-cause. The powder, ink, film, temperature, and humidity inside your shop all interact. Solving a recurring DTF printing problem usually means changing one variable at a time and observing the result — not changing three things at once and hoping the combination works.

Is DTF Printing Right for Your Production Mix?
DTF printing is not the answer to every printing need, but it solves a specific set of problems that DTG and sublimation handle poorly. Here is when DTF printing makes the most sense, and where a different method still leads.
When DTF Printing Is the Best Fit
- Mixed fabric types daily. If your order queue bounces between cotton tees, polyester hoodies, denim jackets, and canvas tote bags, DTF printing handles all of them without workflow changes. No other digital printing method does this.
- Mostly dark or colored garments. DTF printing's opaque white underbase makes dark garment printing straightforward. DTG needs pretreatment; sublimation simply does not work on dark fabric.
- Mostly one-off custom orders. DTF printing has no screen setup, no weeding, and no minimum run. Print one film, press one shirt, move on. For shops that run on single-piece custom orders, DTF printing is the most cost-effective method on the market.
- Want to skip pretreatment. The labor savings from skipping pretreatment are significant at any volume. Over a production day, those two to three minutes per shirt add up to hours of paid labor that DTF printing simply does not require.
When Another Method Still Leads
- Ninety percent white cotton tees with photo-quality artwork. DTG gives a softer hand-feel and lower ink cost per print.
- Exclusively polyester sportswear. Sublimation remains the standard for polyester because the dye bonds at the fiber level, not on top.
- Very high-volume single-design production. Screen printing still wins on cost per piece past a few hundred units of the same design.
For the vast middle ground — mixed fabrics, dark garments, variable order sizes — DTF printing is the most flexible option available today.
DTF Printing Equipment and Consumables from FCOLOR
A lot of companies sell DTF printing equipment. Fewer manufacture the printers themselves. Even fewer manufacture both the equipment and the consumables under the same quality system. FCOLOR (Fullcolor Technology Limited) does both, which is why this guide ends with a section on what we actually manufacture and how we run a DTF printing line day to day.
FCOLOR has been building digital printing equipment in our Dongguan factory for more than ten years. Our DTF printing systems run on Epson i3200 and XP600 printhead platforms. We do not ship cheaper clone heads because the long-run failure rate and downtime cost more than the upfront savings, and we will not put our brand on a DTF printing printer we know will cause our customers more service tickets than the discount is worth. Every printer ships with a calibrated print profile for our in-house DTF ink, so the first week of operation is spent producing customer orders, not dialing in color accuracy.
Why a Matched FCOLOR DTF Printing System Performs Better
Our DTF printing consumables — PET film, hot-melt powder, and pigment ink — are tested as a system. The DTF printing film coating is formulated to work with our powder's specific melt profile. The DTF printing ink viscosity is matched to the printheads in our machines. When a customer reports a quality issue with DTF printing, we can diagnose it without the finger-pointing that happens when film, ink, and powder come from three different factories.
FCOLOR holds ISO 9001, CE, OEKO-TEX, and RoHS certifications. Our DTF printing products ship to print shops and distributors in more than 60 countries. If you are evaluating DTF printing equipment, we will send a printed sample on your choice of fabric so you can see — and feel — the output before you commit to anything.
The decision a DTF printing shop owner makes on day one is not which printer is loudest in the spec sheet. The decision is which supplier will still answer the phone in twelve months when a film-coating question, a powder-melt question, or an ink-viscosity question comes up. FCOLOR was founded to be that supplier for DTF printing, and that is what the rest of our product line is built around.