DTF Ink Fluidity, Starvation and Printhead Clogging
- Share
- publisher
- FCOLOR
- Issue Time
- Nov 9,2026
Summary
Five DTF ink fluidity failures and the factory recovery for each: nozzle check defects from debris and expired ink, banding that starts after fifteen minutes from delivery impedance and grounding float, mid-print dropouts from closed valves and air ingress, thin layers from settled pigment, and severe clogs that need soaking or replacement. Includes the evidence to send before flushing anything, and the thresholds that decide recovery versus a new head.
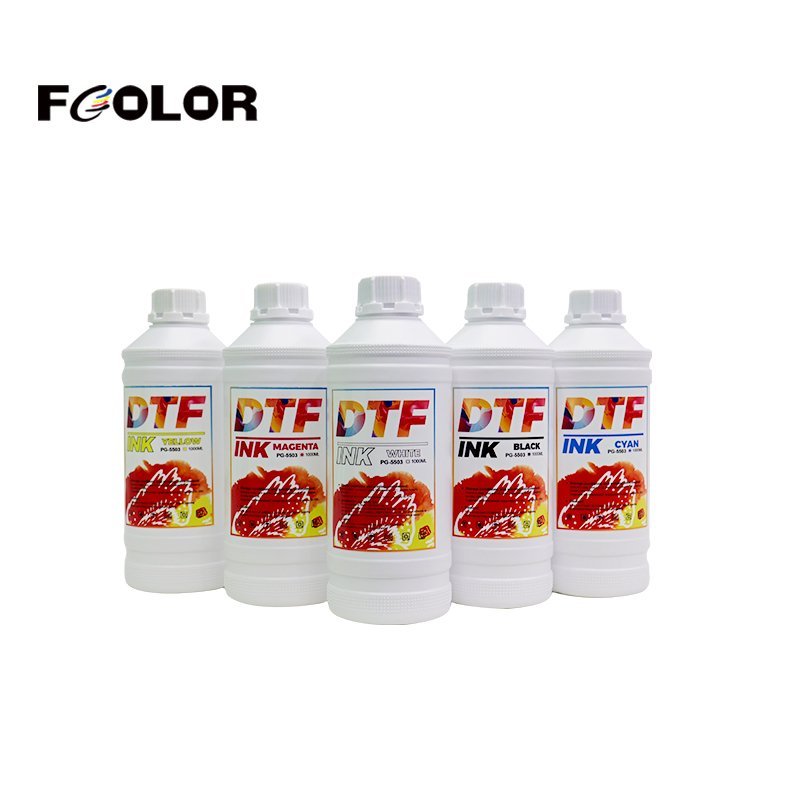
Printhead clogging, mid-run ink starvation and progressive dropouts are the leading cause of unscheduled downtime in DTF apparel printing. The pattern is familiar: horizontal lines appear after fifteen minutes of printing, or a color channel drops out halfway through a fifty-metre roll, and the first conclusion is a bad ink batch.
In industrial practice that conclusion is usually wrong. Fluid starvation is more often negative pressure decay, micro-sediment in the damper filter, floating electrical ground, or a capping seal that stopped sealing. This guide works through the five failure modes, what to document before flushing anything, and the thresholds that decide whether a head is recoverable or finished.
DTF Ink Fluidity Problems: The Evidence We Need First
Before flushing printheads or changing sub-tank heights, document the system state. With these five items an engineer can read the fluid dynamics of your machine without guessing, and usually without a site visit.
| # | Evidence | Why it matters |
|---|---|---|
| 1 | Continuous print video — a steady 30 seconds of the carriage running at production speed, with the ink lines into the dampers and the moment of dropout visible | Shows whether the failure is gradual or instantaneous, which separates starvation from an electrical fault |
| 2 | Ink delivery footage — bulk tanks, circulation pumps, shut-off valves, sub-tank float sensors, damper fill levels | Confirms the supply train is actually feeding the head |
| 3 | Nozzle test prints — macro photographs of the check pattern taken immediately before the defect and immediately after printing stops | Distinguishes a nozzle that was already dead from one that died under load |
| 4 | Maintenance log — head strikes, jams, wiper or capping replacements, recent ink brand changes | Most sudden fluid faults trace back to an action taken in the previous 72 hours |
| 5 | Workshop telemetry — ambient temperature and relative humidity measured at the platen | Viscosity and evaporation rate both move with the room, not the machine |
DTF Ink Nozzle Check Defects: Missing Nozzles and Deflected Jets
Symptoms
A fresh nozzle check shows broken lines, missing segments across color or white channels, or irregular stair-stepping where jets fire at an angle instead of a clean vertical track.
Root cause
- Debris and dried pigment on the faceplate — textile dust and airborne hot-melt powder settle on the platen, adhere to the wet nozzle plate and deflect the drop trajectory
- Cured ink on the wiper and capping station — a stiffened or encrusted wiper drags dried pigment across the plate during cleaning, pushing air into the nozzle chambers
- Expired or destabilised ink — water-based DTF pigment relies on polymeric dispersants to hold a sub-150 nm suspension. Past its date the resin crosslinks and pigment agglomerates, and the 20–30 micron orifices block
Recovery path
- Inspect the plate, do not scrub it. Park the head over the platen with carriage motors off, then examine the plate perimeter with an inspection mirror and a high-intensity light. Wipe lint from the metal bezel with lint-free polyester swabs moistened with FCOLOR cleaning solution. Never wipe dry material across the orifice grid.
- Restore the station seal. Clean the rubber wiper until the edge is clean and square; replace it if it is nicked, rounded or permanently hardened. Clean the silicone rim of the cap top, because automatic vacuum priming only works against an airtight seal.
- Check ink age against the shelf life. Discard white ink beyond 6 months from production and color ink beyond 12 months. This is not a conservative margin; it is where the dispersion starts to fail.
- Prime, then let the meniscus settle. Run one automated clean with a 30-second vacuum draw, then leave the head sealed on the capping station for 3 to 5 minutes before test printing. Test printing immediately after a purge is why some cleans look like they failed.
- Flush manually if nozzles stay out. Using silicone tubing, attach a clean syringe of warm (35–40 °C) FCOLOR flushing solution to the manifold inlet and apply gentle pressure — no more than 0.5 bar, roughly thumb pressure. A healthy head produces a uniform straight curtain of fine streams across all nozzles. A ragged or partial curtain means the blockage is upstream of the plate.
DTF Ink Banding That Starts After Fifteen Minutes of Running
Symptoms
The job begins at a perfect nozzle count. After 10 to 30 minutes of continuous printing, horizontal white streaks appear in solid fills and worsen until whole color bands drop out. Pausing and running an automatic clean restores the nozzles, and the fault returns as soon as production resumes.
Root cause
This is starvation from delivery impedance, not permanent clogging. The piezo actuators are emptying the nozzle chambers faster than the supply train can refill them.
- Aged tubing and dampers — polyurethane ink line hardens, micro-cracks, or accumulates biofilm on the inner wall, narrowing the bore
- Floating ground and unstable local voltage — static on an ungrounded chassis interferes with carriage firing signals, and voltage sag distorts the nozzle drive waveform over a long run
- Cap-off drying during standby — a poor capping seal lets volatile humectants evaporate, so viscosity creeps up before the shift even starts
Remediation
- Replace the consumable part of the supply train. Dampers are a maintenance item, not a fit-and-forget component — replace them every 3 to 6 months. Their internal stainless mesh traps micro-agglomerates and progressively restricts high-speed flow. Flush the supply tubes with maintenance solution at the same time.
- Measure the ground. Check continuity between the chassis and a dedicated copper earth rod. Resistance must be below 4 ohms. Verify AC supply at 220 V or 110 V within ±5%, and fit an online AVR if voltage sags when your curing ovens cycle on — a fault that only appears in the afternoon usually is not an ink fault.
- Seal the head properly overnight. Fill the cap top with 2–3 ml of FCOLOR moisturising fluid and confirm the carriage locks fully into the station, so the nozzle face sits at close to 100% local humidity through the idle period.
DTF Ink Starvation and Mid-Print Dropouts
Symptoms
One or more channels drop out completely during printing. Ink tubes look partly drained, or fine bubbles travel continuously toward the carriage.
| Checkpoint | Visual or functional check | Immediate action |
|---|---|---|
| 1. Manual valves | Shut-off lever positions on each line | Open all supply petcocks fully |
| 2. Damper level | Liquid level in the damper body | Should sit at 50–70% full |
| 3. Mesh clog test | Syringe draw resistance at the damper | Replace the damper if the draw is stiff |
| 4. Tube fittings | Quick-connects and O-rings | Tighten nuts, replace worn seals |
Root cause
- Closed or pinched shut-off valves — a line valve knocked during maintenance restricts flow
- Damper filter blinding — gelatinised ink or pigment flocculation completely covers the micro-mesh
- Air ingress at connectors — a loose luer fitting or cracked damper collar draws ambient air under negative pressure and breaks the hydraulic siphon
Remediation
- Trace every valve. Follow each line from bulk tank to carriage and confirm both manual and solenoid valves are fully open.
- Run the damper draw test. Disconnect the damper from the manifold, insert a clean syringe tip into the silicone outlet and draw back gently. Ink should move smoothly with no excess resistance and no bubbling in the chamber. If the plunger snaps back hard or the syringe fills with froth, the filter is blinded or the fitting is pulling air — replace the damper and retighten the line.
- Confirm white circulation. White ink should circulate at least 5 minutes in every 30, so pigment does not settle in the delivery elbows.
DTF Ink Layer Too Thin and Density Too Weak
Symptoms
Graphics print thin, washed out or semi-transparent. Even with color curves pushed high, the white underbase never builds structural thickness, so opacity on dark fabric is weak and the hand-feel stays flat.
Root cause
- Pigment stratification during idle time — heavy titanium dioxide in white and organic pigment complexes in CMYK settle to the bottom of the container, leaving low-concentration carrier at the siphon tube
- Ink limits set too low — total ink limit or per-channel ink-cut in the RIP caps droplet firing frequency, so density cannot be recovered by the color curve alone
Remediation
- Agitate before production, not after a bad print. If the machine has stood idle for more than 48 hours, agitate the bulk bottles for 5 to 10 minutes before the first job. On white sub-tanks without a stirrer, cycle the ink with a clean syringe until density is visibly homogeneous.
- Know when agitation stops working. Ink left unagitated for weeks can form hard cake that no amount of shaking will redissolve. Drain the line, flush with cleaning solution and charge a fresh batch — continuing to print it only wastes film.
- Then calibrate the RIP. Open the media print properties and review the white underbase and color density sliders. White density generally lands in the 80–95% range depending on fabric absorption. Set the ink limit to the maximum your PET film takes without puddling or bleeding — the ceiling belongs to the film, not to the slider.
DTF Ink Clogs That Need Soaking or a New Printhead
Symptoms
Repeated cleaning cycles fail to recover specific channels. Nozzle segments stay dead across every attempt, leaving persistent vertical scratch lines through graphics.
Root cause
- Dried pigment plugs inside the cavity — solvent evaporated inside the micro-cavity, leaving a cured polymer-pigment matrix on the piezo wall
- Head strikes — the carriage has hit a curled PET edge, warping the nozzle plate or shearing internal micro-nozzles
- Ink mixing without a flush — switching chemical brands without a full intermediate solvent flush causes cross-polymerisation and near-instant gelation in the manifold
Recovery protocol
- Soak, do not force. Lower the head into a shallow glass dish holding 3–5 mm of FCOLOR recovery solution at 40 °C and leave the faceplate submerged for 30 to 60 minutes, so the surfactant penetrates and dissolves the binder.
- Reverse-flush. Draw fluid gently from the bottom upward with a clean syringe. Pushing forward drives debris deeper into the filter mesh and converts a recoverable head into a replacement.
- Apply the replacement criteria. If jets still deflect severely after soaking, or ink seeps between adjacent color channels on the faceplate — the internal cavity adhesive has delaminated — the head is physically or electrically finished. Replace it.
- Protect the new head. Fit new dampers, cap top and wiper blade at the same time. Reusing the old seals on a new head is how the second head fails within a month.
DTF Ink Fluidity Summary: Five Failures, Five Fixes
| Problem | Inspect first | Probable cause | Resolution |
|---|---|---|---|
| Nozzle check defects | Plate for fibres; wiper and cap condition | Debris; dried wiper; expired ink | Clean plate and wiper; purge; syringe flush |
| Banding after running | Line dampers; measure ground resistance | Delivery starvation; static; cap drying | Replace dampers; ground below 4 ohms; overnight moisturising |
| Continuous starvation | Line valves; damper draw test | Closed valve; blinded filter; air leak | Open valves; replace damper; retighten fittings |
| Thin layer, low density | Bottle sediment; RIP ink limit | Settled pigment; software ink cut | Agitate; charge fresh ink; raise ink limit |
| Severe clog | Head strike history; soak response | Cavity plug; delamination; ink mixing | 40 °C soak; reverse flush; replace head |
The distinction that saves the most money: a head that clogged this week can usually be recovered by soaking. A head left clogged for weeks often will not recover at all, and no amount of cleaning fluid changes that. Speed matters more than method.
About FCOLOR DTF Ink
Dongguan Fcolor Digital Technology Co., Ltd. manufactures high-stability inkjet consumables for the textile and industrial digital printing markets from its plant in Humen Town, Dongguan:
- DTF inks — nano-milled pigment with high fluidity, anti-settling white formulation and wash fastness
- Direct-to-film PET media — high-load glossy, matte, single-sided and double-sided release films with anti-static treatment
- Thermoplastic hot-melt powder — high-elasticity polyurethane adhesive for soft hand-feel and wash endurance
- Digital ink suite — sublimation, textile pigment, UV curable and eco-solvent inks
Our technical service engineers support DTF printshops in more than 80 countries, and the fluidity protocols above come from that ticket history rather than from a lab bench.